Appetizers
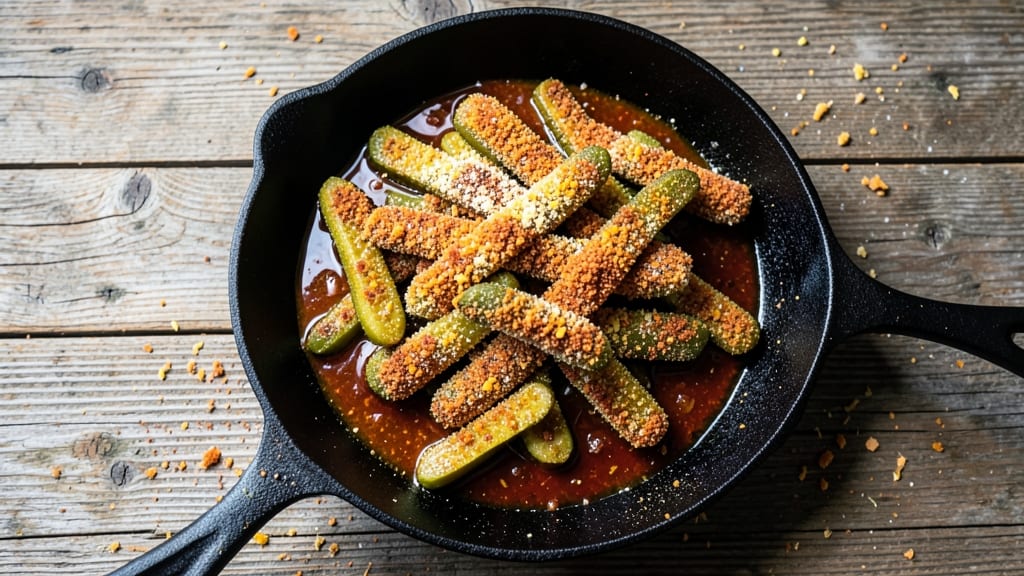
Here’s the bww fried pickles recipe you’ve been craving—crispy cornmeal-battered bites that crackle with every bite, perfectly paired with vinegar’s tangy kiss. The secret lies in the batter composition: a precise mix of flour, cornmeal, and spices that creates an irresistible crunch while keeping the pickles tender inside.
I've perfected this method after countless batches, ensuring restaurant-quality results at home.
The process starts with a simple yet critical step: soaking the pickles in vinegar brine to enhance their natural tang before coating them in the signature batter.
Once fried to a golden brown, these pickles develop that signature crispy exterior that shatters with each bite, while the vinegar brine keeps the interior juicy and flavorful. This is the kind of appetizer that disappears faster than you can say "Southern hospitality."
What makes this recipe truly special is the balance of textures and flavors—crispy batter meets tangy, vinegar-soaked pickles, creating a contrast that's impossible to resist. The cornmeal adds that signature crunch, while the spices in the batter provide just the right amount of kick.
This isn't just an appetizer; it's an experience that brings the soul of Southern cooking to your table.
Serve these crispy fried pickles with your favorite dipping sauce—ranch, blue cheese, or even a spicy mayo—for the ultimate game-day or tailgate spread. The recipe scales effortlessly, so you can feed a crowd without breaking a sweat. Let's get started on creating this Southern classic in your own kitchen.
Ingredients for bww fried pickles
These simple ingredients transform ordinary pickles into crispy Southern bites you'll crave.
| Ingredient | Amount | Notes |
|---|---|---|
| Dill Pickle Spears 🥒 | 1 ½ lb | Full-sized, not baby pickles |
| White Vinegar 💧 | 1 cup | For soaking brine |
| All-Purpose Flour 🌾 | 1 cup | For light, crispy batter |
| Cornmeal 🌽 | ¾ cup | Fine grind for texture |
| Yellow Corn Flour 🌽 | ¼ cup | For extra crunch |
| Paprika 🌶️ | 1 tbsp | Smoked for depth |
| Garlic Powder 🧄 | 1 tsp | Freshly ground preferred |
| Onion Powder 🧅 | 1 tsp | For subtle sweetness |
| Ground Black Pepper 🌶️ | ½ tsp | Freshly cracked |
| Salt 🧂 | 1 tsp | Kosher or sea salt |
| Vegetable Oil 🫒 | 3 cups | For frying, 350°F |
| Large Eggs 🥚 | 1 whole | Room temperature |
| Beer 🍺 | ½ cup | Light lager or pale ale |
The pickles are the star, so grab full-sized dill spears—they hold up better during frying. Trader Joe's and KrogerBob's Red Mill makes a fine grind that works perfectly. I always toast my cornmeal for 2 minutes in a dry pan before mixing (trust me on this), which adds a nutty depth. For the beer, a light lager like Budweiser or a pale ale works best—avoid dark beers that can overpower the tang.
No cornmeal? Substitute extra corn flour (same amount), but you'll lose that slight gritty texture. Short on beer? Use pickle juice instead—it keeps the tang while adding moisture to the batter. Fresh spices matter here—pre-ground paprika loses punch fast, so Penzeys or bulk bins are worth it. The batter should be thick but pourable; if it's too stiff, add a splash of beer. Pro tip: chill the batter for 30 minutes before dredging—it makes all the difference in crispiness. And whatever you do, don't skip the egg wash between batter coats!
Fry these fresh—the batter loses crispiness fast. Keep fried pickles on a wire rack over paper towels to stay crispy while you finish the batch. They reheat beautifully in the oven at 375°F for 5 minutes (worth the extra minute if serving later). Store leftovers in an airtight container for up to 2 days, but honestly, they won't last that long. For game day? Double the recipe—they disappear faster than you can say "refill the dip". The oil can be reused once (strain and store in the fridge) for up to 3 more batches.
Why You'll Love This Recipe
- Pantry Magic: I swear by this recipe because it turns three things I always have—pickles, flour, and vinegar—into something unforgettable. No fancy ingredients, no special trips to the store. Just open the jar, grab the pantry staples, and go.
- Crunchy-Creamy Obsession: That golden crust from the cornmeal and yellow corn flour? Chef’s kiss. It’s crispy outside but still tangy and juicy inside—like a pickle hugged a crunchy blanket. Honestly, I’ve never met a fried pickle I didn’t like, but these? They’re the ones that make me reach for seconds.
- Game for Any Gathering: Slap these on a burger, toss them into tacos, or serve them as a snack with ranch. They’re the MVP of game day, potlucks, or even a lazy Sunday when you’re craving something bold. (Yes, even on a Tuesday night.)
Step-by-step instructions for crispy vinegar-kissed fried pickles
Here's how to achieve that perfect crunchy exterior with a tangy, vinegar-infused bite every time.
Prepare the Vinegar Brine for Maximum Flavor
In a large bowl, combine the 1 cup white vinegar and 0.5 cup beer. This tangy mixture is your secret weapon for that signature BBQ fried pickle flavor. Let it sit for 5 minutes while you prep the pickles—this gives the vinegar time to mellow slightly and enhances the overall taste.
Add the 1.5 lb dill pickle spears to the vinegar mixture and let them soak for 15-20 minutes. You'll notice the pickles start to soften slightly and absorb that vinegar-kissed tang. This step is crucial—it ensures your fried pickles have that signature BBQ flavor even before they hit the fryer. Don't skip it, and don't soak longer than 20 minutes or the pickles will get too soft for frying.
Create the Perfect Crispy Batter
In a medium bowl, whisk together the 1 cup all-purpose flour, 0.75 cup cornmeal, 0.25 cup yellow corn flour, 1 tbsp paprika, 1 tsp garlic powder, 1 tsp onion powder, 0.5 tsp ground black pepper, and 1 tsp salt. This blend gives you that perfect balance of lightness and crunch. I like to use a whisk to break up any lumps in the cornmeal—it makes a noticeable difference in the final texture.
In a separate small bowl, beat the 1 whole large egg until just combined. Then, gently stir the beaten egg into the dry ingredients until you have a smooth, thick batter that coats the back of a spoon. The batter should be thick enough to cling to the pickles but still flow easily when you dip them. If it's too thick, add 1-2 tablespoons of water to loosen it slightly. This step is where you build that golden, crispy exterior we're after.
Heat the Oil and Fry in Batches
Fill a deep fryer or heavy pot with 3 cups vegetable oil and heat to 350°F. Use a deep-fry thermometer to monitor the temperature—this is critical for getting that perfect crisp without burning. Let the oil come to temperature for 5-10 minutes before frying. You'll know it's ready when a small piece of batter dropped in sizzles immediately and floats to the surface.
Working in batches (don't overcrowd the fryer), remove the pickles from the vinegar mixture and let them drain briefly on a wire rack or paper towels. Then, dip each pickle spear into the batter, letting any excess drip off before carefully sliding it into the hot oil. Fry for 2-3 minutes per side until they're golden brown and crispy. You'll see bubbles form around the pickles—that's your signal they're cooking properly. Use a slotted spoon to remove them and drain on a wire rack lined with paper towels.
Serve Immediately for Maximum Crunch
Serve the fried pickles immediately while they're still crispy and hot. The longer they sit, the softer they become—this is where timing matters most. I like to arrange them on a platter and sprinkle with an extra pinch of salt right before serving. The contrast of that crispy exterior with the tangy, vinegar-soaked interior is what makes these pickles so addictive.
For an extra kick, serve with a side of ranch or blue cheese dressing to dip. The coolness of the dressing cuts through the heat and crispiness perfectly. These pickles are best enjoyed right away, but if you need to reheat them, pop them in a 350°F oven for 3-5 minutes to restore some of that crunch. Just don't expect it to be quite as perfect as when they first come out of the fryer!
Pro Tips For Making Bww Fried Pickles
- DRY THE PICKLES FIRST: Vinegar makes pickles slick—toss them in a towel and pat dry for 10 minutes before coating. I learned this the hard way when my first batch turned into a soggy mess in the fryer.
- USE COLD FLOUR MIX: Chill your cornmeal and flour blend in the fridge for 20 minutes before dredging. The cold mix sticks better and makes a crisper crust—no more flaky, falling-off coatings.
- FRY IN BATCHES: Overcrowding drops the oil temp and steams the pickles instead of frying them. Keep batches small—3-4 spears at a time—and work fast to maintain that golden crunch.
- SWAP WHITE VINEGAR FOR PICKLE BRINE: Skip the extra vinegar dip—just use the brine from your jar. It’s already seasoned, cuts down on mess, and keeps the tang balanced without extra acidity.
Pro cooking tips for great bww fried pickles
Batter Consistency
The key to that signature crispy exterior lies in batter consistency—it should be thick enough to cling to the pickles but still flow smoothly. I always aim for a texture similar to heavy pancake batter.
If your batter feels too stiff, add 1 tablespoon of beer or pickle juice at a time until it reaches the right pourability. Remember, the cornmeal blend needs time to hydrate properly, so let the batter rest for 30 minutes in the fridge before dredging.
This chilling step is non-negotiable for maximum crispiness. 🌽
Oil Temperature
Maintaining a precise oil temperature of 350°F is absolutely critical for perfect fried pickles. Too hot, and they'll burn before cooking through; too cool, and they'll absorb oil instead of crisping. I use a ThermoWorks Thermapen to monitor the temperature constantly—it's worth the investment.
If you don't have a thermometer, test the oil by dropping in a small piece of batter: it should sizzle immediately and float within 30 seconds. Never exceed 355°F or you'll lose that perfect crunch.
Double Dredging
For that extra-crispy texture, I always double-dredge the pickles. After the initial batter coating, let them rest on a wire rack for 1-2 minutes, then dip them back into the batter for a second coat. This creates multiple crispy layers that shatter with every bite.
The secret is to let the excess batter drip off completely before frying—this prevents oil splatter and ensures even cooking. Work quickly but carefully during this step, as the pickles will start cooking immediately once they hit the hot oil. 💡
Batch Control
Overcrowding the fryer is the fastest way to ruin your fried pickles. I fry in batches of 8-10 pickles at a time maximum, giving them plenty of room to cook evenly. If you're short on time, consider using a deep-fat fryer with a larger capacity—it maintains more consistent temperatures.
Never let the oil temperature drop below 340°F during frying, or you'll end up with greasy rather than crispy results. Keep a small bowl of ice water nearby to quickly cool fried batches while you finish the remaining pickles.
Post-Fry Draining
The way you drain fried pickles makes all the difference. I always use a wire cooling rack lined with paper towels rather than a plate—this allows air to circulate and maintains crispiness. After frying, transfer the pickles immediately to the rack and let them drain for 2-3 minutes.
Pat them gently with additional paper towels if they seem particularly oily. The goal is to remove excess oil while preserving that perfect crunch. Pro tip: Sprinkle with flaky sea salt right after draining to enhance the flavors before they cool completely. ⚡
Reheating Secrets
If you must reheat fried pickles, the oven is your best friend. Spread them on a baking sheet and heat at 375°F for 3-5 minutes until they regain some crispiness. The microwave is a no-go—it turns them soggy.
For serving later, I like to keep fried pickles warm in a 200°F oven on a wire rack for up to 30 minutes***. This low-and-slow method maintains texture better than any other reheating technique. Just remember: freshly fried pickles always taste best, so plan your timing accordingly. 🔥
Nutrition facts
Frequently asked questions
Can I use regular pickles instead of dill pickles?
While you can technically use other types of pickles, dill pickles are the traditional choice for this recipe. Their mild tang and firm texture work best with the crispy batter. If using bread-and-butter or kosher dills, soak them in extra vinegar (1:1 ratio) for 30 minutes to intensify the flavor. Avoid soft pickles like sweet or banana peppers—they won't hold up during frying.
Why does my batter keep falling off the pickles?
This usually happens when the batter is too thin or the pickles aren't properly drained. First, ensure your batter has a thick but pourable consistency—like heavy pancake batter. Second, pat the pickles dry after the vinegar soak and let them rest on a wire rack for 2 minutes before dredging. Chilling the batter for 30 minutes also helps it adhere better.
Can I make this recipe without beer?
The beer adds flavor but isn't essential. Replace it with an equal amount of pickle juice or buttermilk for moisture, or use sparkling apple cider for a subtle sweetness. For the batter, you can also substitute 1 tablespoon of vinegar to maintain the tangy profile. The cornmeal blend will still give you that signature crunch.
How do I keep fried pickles crispy for serving?
Serve them immediately on a wire rack (never a plate) to prevent sogginess. If you need to hold them, keep in a 200°F oven on a rack for up to 30 minutes. For reheating, oven at 375°F for 3-5 minutes works best—microwaving turns them rubbery. Pro tip: Sprinkle with flaky salt right after frying while they're still hot.
What's the best oil for frying these?
Use vegetable, canola, or peanut oil—they have high smoke points and neutral flavors. Avoid olive oil (too low smoke point) or butter (burns easily). For best results, keep oil between 340-355°F. If you notice the oil smoking excessively, reduce heat immediately.