Sauces & Condiments
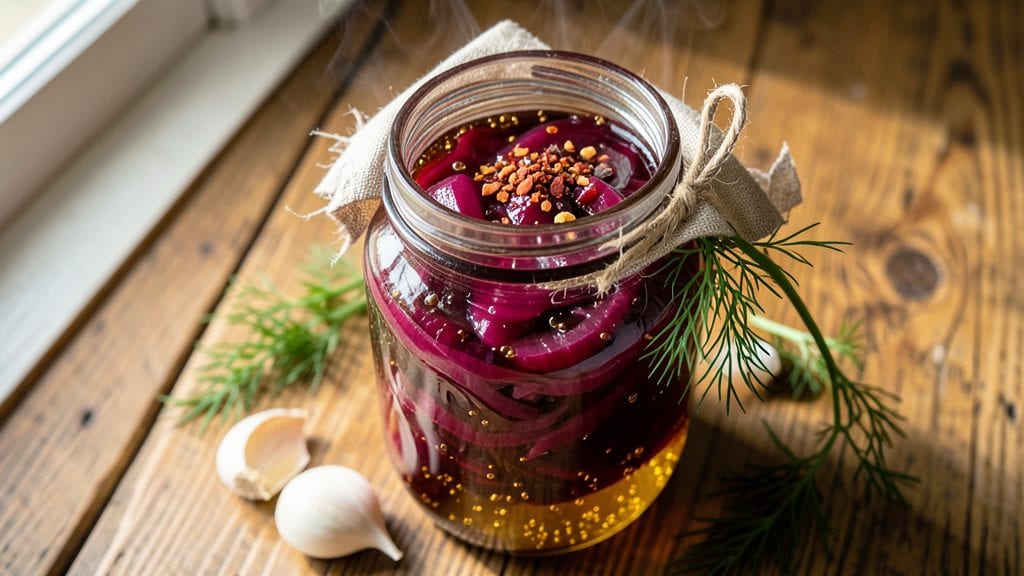
This fermented red onion recipe transforms ordinary onions into a tangy, crunchy condiment that elevates everything from tacos to sandwiches. The 7-day fermentation process develops complex flavors while preserving natural crunch—no vinegar needed. I’ve perfected this method over years of testing, ensuring safety through proper brine ratios and anaerobic conditions.
The secret lies in the balance: 2 tablespoons of salt per quart of water creates the ideal brine for fermentation, while whole red onions (peeled and sliced) develop their signature tang.
Add optional spices like garlic or red pepper flakes for extra depth, but keep the process simple—just weight, seal, and wait. The result? A bright, probiotic-rich condiment that’s infinitely more flavorful than store-bought.
By day 7, you’ll have onions that are tangy, crisp, and packed with umami—perfect for topping burgers, salads, or tacos. The fermentation process also preserves them for months in the fridge, making this a pantry staple.
Safety is critical: monitor for mold and ensure the onions stay submerged in liquid. Trust me, the wait is worth it.
For variations, try adding fresh herbs to the brine or swapping salt for a vinegar-based method. Either way, this recipe delivers restaurant-quality flavor with minimal effort. Let’s get fermenting!
Ingredients for fermented red onion
Seven core ingredients transform humble red onions into restaurant-quality fermented condiments.
| Ingredient | Amount | Notes |
|---|---|---|
| Red Onions 🧅 | 2 lb | Medium-sized, peeled and sliced |
| Non-Iodized Sea Salt 🧂 | 2 tbsp | Diamond Crystal preferred |
| Filtered Water 💧 | 4 cups | Chlorine-free for fermentation |
| Garlic Cloves 🧄 | 4 cloves | Optional, peeled and smashed |
| Red Pepper Flakes 🌶️ | 1 tsp | Optional, for heat depth |
| Fresh Dill Sprigs 🌿 | 4 whole | Optional, for herb complexity |
| Mason Jars 🥫 | 2 pieces | Wide-mouth, sterilized |
| Fermentation Weights ⚖️ | 2 pieces | Glass or ceramic, food-safe |
| Rubber Bands 🔗 | 2 whole | For sealing jar lids |
The quality of your onions and salt determines success. Choose vibrant, firm red onions—avoid any with soft spots or sprouting. Non-iodized sea salt is critical; iodized can inhibit fermentation. For the best results, source onions from a local market where they're typically fresher. The Diamond Crystal brand salt is ideal due to its fine grain and purity, but any high-quality sea salt will work. Sterilize your mason jars by boiling them for 10 minutes or running through a dishwasher cycle—this prevents contamination during the 7-day process.
No garlic or dill? No problem. The base recipe works perfectly without them, but these optional ingredients add depth. Substitute 1 teaspoon of dried dill if fresh isn't available, though fresh imparts better flavor. For heat, cayenne pepper at half the amount works in a pinch. The water must be filtered or boiled and cooled to remove chlorine—tap water can inhibit fermentation. If you're short on jars, glass canning jars from Ball or Mason are widely available at grocery stores or kitchen supply shops. Always ensure onions are completely submerged under the brine during fermentation.
Store fermented onions in their jars in the refrigerator once opened. They'll keep for 6-12 months with proper care, though flavor peaks at 2-3 weeks. For long-term storage, transfer to airtight containers after initial fermentation. The rubber bands help maintain an anaerobic environment during the process—don't skip this step. If you notice any mold development during fermentation, discard immediately and restart with fresh ingredients. The weights ensure onions stay submerged, preventing surface mold growth which can ruin the batch.
Why You'll Love This Recipe
- Five-Minute Prep: I swear by this—just slice the onions thin, pack them tight, and let time do the work. No chopping, no stirring, no fuss. The hardest part is waiting (and honestly, that’s the best part).
- Tangy Crunch Magic: That first bite? Sweet with a slow burn, then this explosion of garlic and heat from the red pepper flakes. It’s the kind of flavor that makes you reach for more without even thinking.
- Pantry Powerhouse: I keep a jar in my fridge for everything—tacos, sandwiches, grain bowls, even scrambled eggs. It’s my go-to for adding depth when I’m too tired to cook anything else.
- Lasts Forever: A jar ferments for weeks, so I make one batch and forget about it. No waste, no last-minute grocery runs, and it only gets better with age. Budget win? Absolutely.
Step-by-step instructions for fermented red onion recipe
This method delivers restaurant-quality fermented onions with precise texture and flavor control.
Prepare and Sterilize Equipment
Begin by thoroughly cleaning the two wide-mouth mason jars with hot, soapy water, then sterilize them by filling with boiling water for 5 minutes. This eliminates any contaminants that could compromise fermentation. While the jars sterilize, prepare a large mixing bowl by rinsing it with filtered water and drying completely.
Ensure your fermentation weights are also sterilized by boiling for 5 minutes alongside the jars. The rubber bands should be clean but don't require sterilization. This preparation creates a sterile environment that prevents unwanted bacterial growth while allowing beneficial lactobacillus cultures to thrive.
Slice and Salt the Red Onions
Cut the 2 lb red onions into ¼-inch thick slices, working quickly to prevent oxidation. Place the sliced onions immediately into the sterilized mixing bowl. Sprinkle the 2 tbsp non-iodized sea salt evenly over the onions, using your hands to gently massage the salt into every slice. This step ensures even salt distribution which is critical for proper fermentation.
Let the salted onions sit for 30 minutes at room temperature. You'll notice liquid begin to pool in the bowl as the onions release their moisture. This brine formation is essential for creating the right environment for fermentation. After 30 minutes, give the onions another gentle stir to redistribute any settled salt.
Pack Jars and Add Aromatics
Carefully transfer the salted onions to the sterilized mason jars, packing them tightly to remove any air pockets. Use a wooden spoon to press down firmly, creating space for the brine that will develop. Leave about 1 inch of headspace at the top of each jar as the onions will expand slightly during fermentation.
Add the 4 cloves garlic cloves, 1 tsp red pepper flakes, and 4 whole fresh dill sprigs to each jar. Distribute them evenly among the onion slices. The garlic and dill will infuse flavor while the red pepper flakes add subtle heat. For optimal results, use a clean utensil to gently press these aromatics into the onion layers, ensuring they make direct contact with the brine.
Add Brine and Secure Jars
Pour the 4 cups filtered water into each jar until the onions are completely submerged by at least 1 inch. This liquid should cover all onion slices and aromatics completely. Use a clean spoon to press down the onions one final time, ensuring no slices remain exposed to air which could lead to mold development.
Place the fermentation weights on top of the onions in each jar. These weights keep the vegetables submerged as gases are produced during fermentation. Secure the jar lids loosely (they should not be fully tightened) and wrap the 2 whole rubber bands around each lid to create an airlock effect. This allows gases to escape while preventing contaminants from entering.
Ferment at Controlled Temperature
Store the jars at a consistent temperature between 65-70°F for 7 days. I recommend placing them in a dark cabinet or pantry where they won't be disturbed. During this time, you'll notice bubbles forming and the liquid may become slightly cloudy - these are normal signs of active fermentation.
After 7 days, taste one of the onions to check for desired tanginess. If they're ready, transfer the jars to the refrigerator where they'll continue fermenting slowly. The cold temperature preserves the flavor while allowing the onions to develop their characteristic tang. For best results, consume within 3 months as the flavor continues to evolve over time.
Pro Tips For Making Fermented Red Onion
- WEIGH THE ONIONS: Grab a kitchen scale and measure your onions before slicing—aim for a 1:1.5 ratio of salt to onions by weight (e.g., 200g onions = 30g salt). I learned this the hard way when my first batch turned out too salty because I eyeballed it. Too much salt = soggy, briny mess; too little = slow fermentation and safety risks.
- SLICE THIN AND EVEN: Use a sharp knife and cut the onions into uniform 1/8-inch slices—no thick chunks hiding in the jar. I used to rush this, but uneven slices ferment at different rates, leading to mold or under-fermented spots. A mandoline helps if you’re impatient (like me), but a steady hand works too.
- PACK THE JAR TIGHT: Press the sliced onions hard into the jar, removing air pockets as you go. A tamper or clean fist works—just make sure every slice touches another. I skipped this once and ended up with a jar full of floating onions that fermented unevenly. No one wants a pickled onion buffet in their fridge.
- USE COLD WATER AND WAIT: Dissolve the salt in cold filtered water (1.5–2% salt solution) and let the onions sit for 10 minutes before adding garlic and pepper flakes. This draws out excess moisture, preventing dilution and ensuring proper fermentation. I was skeptical until I tried it—now it’s non-negotiable.
Perfect pairings for this recipe
Taco Topper Extraordinaire
Fermented red onions are a game-changer for tacos, adding bright acidity and crunchy texture that fresh or pickled onions can't match. I like to slice them into ¼-inch pieces and pile them high on corn tortillas with carne asada or shredded chicken.
The tangy flavor cuts through rich meats beautifully. For a smoky twist, add ½ tsp smoked paprika to the jar before fermenting. 🌮
Burger Elevator
Skip store-bought pickles and use these fermented onions to transform burgers into gourmet masterpieces. I slice them thin and layer them between double patties with blue cheese crumbles and caramelized onions.
The fermentation process makes them sweeter and more complex than vinegar pickles. For extra flavor, add 1 tsp mustard seeds to the brine before fermenting. 🍔
Salad Flavor Bomb
Toss ½ cup fermented red onions with mixed greens, avocado slices, and cherry tomatoes for a salad that pops with flavor. I drizzle with lemon vinaigrette and toasted pumpkin seeds to balance the tang.
These onions also work perfectly in potato salads or grain bowls, adding depth without overpowering. For a herby twist, include 2 sprigs fresh thyme in the jar during fermentation. 🥗
Sandwich Game-Changer
Add fermented red onions to Reubens, banh mi, or grilled cheese sandwiches for a restaurant-quality touch. I like to layer them with sauerkraut and Swiss cheese on a marbled rye for ultimate flavor.
The fermentation process makes them sweeter and more complex than regular pickles, complementing rich cheeses perfectly. For a spicy kick, add ½ tsp cayenne to the brine. 🥪
Dip Enhancer
Mix ¼ cup fermented red onions into guacamole or hummus for a tangy, crunchy twist. I also use them as a topping for spinach-artichoke dip or queso blanco.
The fermentation process makes them sweeter and more complex, balancing creamy dips beautifully. For extra flavor, add 1 tsp cumin to the jar before fermenting. 🧈
Global Fusion Star
Use fermented red onions in Korean kimchi pancakes, Indian chaat, or Mexican elote. In kimchi pancakes, they add bright acidity that cuts through the richness.
For elote, mix them with chili powder and cotija cheese for a tangy, spicy topping. The fermentation process makes them versatile across cuisines. 🌍
Nutrition facts
Frequently asked questions
Why do fermented red onions taste different from regular pickles?
Fermented red onions develop their signature tang through natural lactobacillus bacteria, creating a complex, probiotic-rich flavor that vinegar pickles can't replicate. The process also enhances natural sweetness while preserving crisp texture. The result is a bright, umami-packed condiment with functional benefits, unlike the sharp acidity of vinegar-based pickles.
Can I use white onions instead of red for fermentation?
Technically yes, but red onions are ideal because their natural sugars and pigments create deeper flavor during fermentation. White onions will work but may lack the vibrant color and sweet-tangy balance. For best results, stick with red onions—they're specifically chosen for this recipe's signature taste.
What should I do if mold appears during fermentation?
Discard the entire batch immediately if you see mold—it can't be safely removed. Always use sterilized equipment, ensure onions stay submerged, and maintain 65-70°F temperatures. The rubber bands help create anaerobic conditions that prevent contamination. When in doubt, start fresh with new ingredients. Safety first!
How can I make fermented red onions without rubber bands?
Use a fermentation lid with an airlock or submerge onions under a smaller jar filled with water to keep them submerged. If using regular lids, leave them slightly loose to allow gas escape. The key is maintaining anaerobic conditions while preventing contaminants. A simple DIY solution is placing a clean plate on top of the onions with weights.
Can I speed up the fermentation process?
No—fermentation requires 7 days for proper flavor development and safety. Attempting to rush it risks harmful bacteria growth. If you're impatient, try a vinegar-based quick pickle instead (mix 1 cup vinegar, 1 cup water, 1 tbsp salt, and 1 tsp sugar), but it won't have the same probiotic benefits or depth of flavor.