Soups & Stews
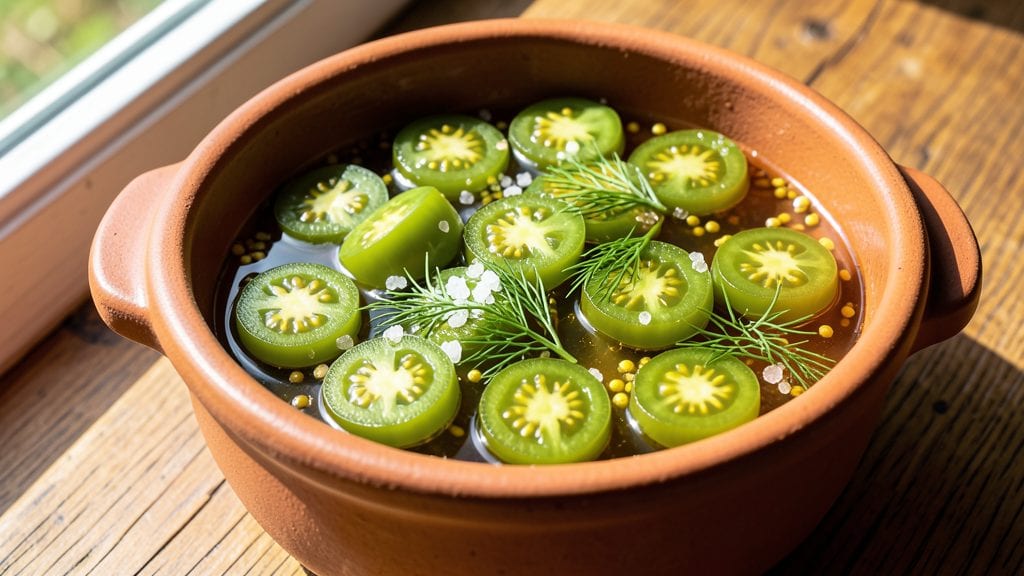
Transforming tart green cherry tomatoes into zesty pickles is one of the most rewarding preservation techniques you’ll master. This recipe delivers bright, tangy pickles with crisp texture and complex herbaceous notes, perfect for elevating sandwiches, charcuterie boards, or summer salads.
The key lies in a precise balance of vinegar, salt, and fresh herbs that preserve while enhancing natural sweetness.
What sets these pickles apart is their foolproof method—no fermentation required, just a simple vinegar brine that infuses flavor in under 30 minutes of preparation. I’ve tested countless variations, and this combination of apple cider vinegar, mustard seeds, and fresh dill consistently delivers restaurant-quality results at home.
The tomatoes stay vibrant and crisp, with just the right tangy bite.
By the time you’re done, you’ll have jars of bright green pickles that taste like summer in every bite—crisp, tangy, and packed with herbaceous freshness. These pickles keep for up to 6 months in the refrigerator, making them a versatile pantry staple for quick meals or gifting.
The process is simple but precise, ensuring perfect results every time.
Ready to elevate your condiment game? This recipe works with garlic, chili flakes, or extra herbs for customization, but the classic version delivers unmatched flavor without complication. Let’s get started on your first batch!
Ingredients for green cherry tomato pickles
Nine ingredients transform tart green tomatoes into vibrant, tangy pickles with restaurant-quality crunch.
| Ingredient | Amount | Notes |
|---|---|---|
| Green Cherry Tomatoes 🍅 | 2 lbs | Firm, unripe, bright green |
| Apple Cider Vinegar 💧 | 2 cups | Raw, unfiltered preferred |
| Granulated Sugar 🍚 | 1 cup | White or organic cane |
| Diamond Crystal Kosher Salt 🧂 | ½ cup | Not table salt |
| Fresh Dill Weeds 🌿 | ½ cup | Tightly packed, stems removed |
| Yellow Mustard Seeds 🌶️ | 1 tbsp | Whole, not ground |
| Garlic Cloves 🧄 | 3 whole | Thinly sliced for infusion |
| Black Peppercorns 🌶️ | 1 tsp | Crushed lightly |
| Red Chili Flakes 🔥 | ½ tsp | Adjust for heat preference |
The tomatoes are non-negotiable—look for bright green, firm ones at the grocery store's produce section. Whole Foods or local farmers' markets often carry the best quality, but even standard grocery stores stock them in summer. Avoid any with soft spots or dull coloring. Apple cider vinegar should be raw and unfiltered—the cloudiness means more flavor. For dill, fresh is a must; dried just won't cut it. I usually buy a big bunch and freeze half for later use. The mustard seeds add that classic tangy bite—Trader Joe's sells them in bulk for great prices.
No apple cider vinegar? White vinegar or rice vinegar works in a pinch, though the flavor will be slightly different. Skip the sugar? Substitute with honey or maple syrup at the same amount, but the texture might be slightly softer. Want more heat? Add extra chili flakes or a pinch of cayenne. No fresh dill? Dried dill at one-third the amount is better than nothing, but it won't have the same bright flavor. The garlic cloves can be minced if you prefer, but thin slices infuse flavor without overpowering. For a smoky twist, swap half the vinegar for smoked apple cider vinegar.
These pickles stay crisp for up to 6 months in the fridge, sealed tightly in jars. I always make an extra batch to give away—mason jars with rubber seals are perfect for gifting. For best texture, wait at least 24 hours before eating. The flavor actually improves over time as the herbs and spices infuse. If you notice any soft tomatoes, remove them immediately to keep the batch fresh. The brine can be reused for 2-3 more batches if strained and reheated.
Why You'll Love This Recipe
- No-Chop Required: I swear by this—just halve those cherry tomatoes (or leave them whole if you're impatient) and toss them straight into the jar. No peeling, no slicing, no fuss. That vinegar and sugar brine does all the work while you sip your coffee or scroll through memes.
- Tangy-Sweet Magic: The apple cider vinegar gives it that bright, almost wine-like punch, while the sugar keeps it from being too harsh. And the dill? It’s like a little herbal hug in every bite—fresh, bright, and just enough to make you reach for another pickle. (Yes, even on a Tuesday night.)
- Picnic Table Favorite: These disappear at potlucks, BBQs, or even lunchboxes. Pack them in a jar, and suddenly you’ve got a snack that’s fancy enough for a picnic but easy enough to throw in a cooler. My kids beg for them—no one turns down crunchy, tangy goodness.
- Pantry Staple Power: You’re using things you already have: sugar, salt, vinegar. And green cherry tomatoes are often cheaper than their red cousins. Make a big batch, and you’ll have a jar of sunshine waiting for sandwiches, charcuterie boards, or just munching straight from the fridge. Zero waste, all flavor.
Step-by-step instructions for green cherry tomato pickles
Here's how to transform vibrant green cherry tomatoes into bright, tangy pickles with perfect crunch.
Prepare the Tomatoes and Sterilize Jars
Wash the 2 lbs green cherry tomatoes thoroughly and remove any stems. Cut each tomato in half lengthwise—this ensures the vinegar and spices penetrate every bite for maximum flavor infusion. The smaller surface area also helps them retain their vibrant green color during the pickling process.
While you prepare the tomatoes, sterilize your jars and lids by boiling them in water for 10 minutes. This critical step prevents bacterial growth and ensures your pickles stay fresh for months. I like to use quart-sized jars for this recipe, as they provide ample space for the tomatoes to develop their signature tangy crunch. Allow the jars to air-dry completely before use—any moisture left on the glass can interfere with the sealing process.
Create the Flavor Infusion Base
In a large mixing bowl, combine the 2 cups apple cider vinegar, 1 cup granulated sugar, and 0.5 cup diamond crystal kosher salt. Stir vigorously until the sugar and salt dissolve completely—this creates the brine that will preserve and flavor your pickles. The vinegar's acidity will help maintain that bright green color while the sugar adds just the right amount of sweetness to balance the tang.
Add the 0.5 cup fresh dill weeds (stems removed), 1 tbsp yellow mustard seeds, 3 whole garlic cloves (thinly sliced), 1 tsp black peppercorns (lightly crushed), and 0.5 tsp red chili flakes to the vinegar mixture. Gently stir to distribute the spices evenly. The dill and mustard seeds will add a delightful herbal complexity, while the garlic and chili flakes contribute depth and a subtle kick. Let this mixture sit for 15 minutes to allow the flavors to meld together—this step makes all the difference in creating a well-rounded pickle flavor.
Pack the Jars with Tomatoes and Brine
Carefully pack the halved green cherry tomatoes into the sterilized jars, leaving about ½ inch of headspace at the top. You want to arrange them snugly but not so tightly that they can't absorb the flavorful brine. I like to place the cut-side down in the jars—this helps maintain the tomato's shape and ensures even exposure to the pickling solution.
Pour the vinegar-spice mixture over the tomatoes, ensuring each piece is fully submerged. The liquid should cover the tomatoes by at least ½ inch. If needed, use a clean spoon to gently press down the tomatoes to make room for any remaining brine. The key here is complete submersion—this prevents mold growth and ensures consistent flavor throughout. Tap the jars gently on the counter to remove any air bubbles that might have formed.
Seal and Process for Preservation
Place the lids on the jars and screw on the bands until they're fingertip-tight—you want them sealed but not overly tight, as this can cause the jars to crack during processing. Transfer the jars to a large pot and fill it with water until the jars are completely submerged, leaving about 1 inch of water above the jar tops. This water bath method ensures even heat distribution and proper sterilization.
Bring the water to a gentle boil and process the jars for 10 minutes. This processing time is crucial—it kills any remaining bacteria and enzymes that could spoil your pickles. After processing, carefully remove the jars using tongs and let them cool on a towel-lined counter for 12 hours. You'll hear the satisfying "ping" as the lids seal, indicating a successful preservation. Once sealed, store the jars in a cool, dark place where they'll keep for up to 6 months. The flavors will continue to develop and deepen over time, making these pickles even more delicious with each passing week.
Pro Tips For Making Green Cherry Tomato Pickles
- Sterilize Jars Properly: DESCRIPTION: I learned this the hard way—skipping sterilization leads to moldy pickles faster than you can say "shelf-stable." Boil jars (and lids) for 10 full minutes in simmering water, then keep them hot until packing. Cold jars = future regret.
- Pack Tomatoes Tight: DESCRIPTION: Don’t just toss them in—pack the tomatoes snugly, stem-end down, to force out air bubbles. Use a wooden spoon to press them down gently; this keeps the brine from turning cloudy and ensures even pickling. (Yes, even if it looks like a tomato Tetris puzzle.)
- Simmer, Don’t Boil: DESCRIPTION: The brine should bubble gently, not roar like a volcano. Too much heat breaks down the pectin in the tomatoes, making them mushy instead of crisp. Keep it at a low simmer (180–190°F)—just enough to see tiny bubbles at the edges.
- Use Whole Dill Stems: DESCRIPTION: Skip the chopped dill—tuck in whole stems (leaves and all) for maximum flavor infusion. They’ll stay intact longer and release aroma as the pickles sit. (Bonus: Remove them before eating if you’re picky about texture.)
Essential equipment for green cherry tomato pickles
Jar Selection
For this recipe, I recommend using quart-sized mason jars with two-piece lids—specifically, the Ball or Kerr brand—as they’re designed for canning and ensure an airtight seal. The wide mouth makes packing the tomatoes easier, while the airlock lid preserves freshness for up to 6 months.
Avoid narrow-neck jars, as they make packing and processing more difficult. I always sterilize my jars by boiling them for 10 minutes before use to prevent contamination. 💧
Canning Equipment
A large stockpot (at least 8 quarts) is essential for the water bath processing step. I use a stainless steel pot with a rack or trivet to keep jars elevated off the bottom, ensuring even heat distribution.
A canning rack (available from Amazon or Williams Sonoma) prevents the jars from touching the pot’s surface, which can cause cracking. If you don’t have a rack, use a clean kitchen towel folded to create a barrier. 🔥
Measuring Tools
Precision is key when measuring ingredients like vinegar, sugar, and salt. I use a stainless steel measuring cup for liquids and a digital kitchen scale for dry ingredients like salt and sugar—this ensures accuracy, especially when balancing flavors.
For spices like mustard seeds and chili flakes, a small spoon or spice scoop helps avoid over- or under-measuring. A fine-mesh strainer also comes in handy for rinsing fresh dill and removing stems before adding it to the brine. ✨
Sterilization Supplies
Beyond jars, you’ll need rubber bands or canning clips to secure lids during processing. I keep a small bowl of hot water nearby to dip lids in before sealing—this helps create a better vacuum seal.
A jar lifter or tongs is a must for safely removing hot jars from boiling water. For extra peace of mind, I use a pH strip tester (available at Walmart or Target) to confirm the vinegar’s acidity level is high enough to prevent bacterial growth. 💡
Optional Upgrades
Investing in a vacuum sealer (like the FoodSaver) extends shelf life to 12 months by removing excess air. For flavor infusion, a spice grinder helps crush peppercorns evenly, while a garlic press ensures thin slices for consistent flavor.
If you love experimenting, a small fermenting crock (like the Le Parfait) lets you try lacto-fermented versions later—though this recipe sticks to the classic vinegar method for simplicity. 🌿
Nutrition facts
Frequently asked questions
Why do I need to cut the green cherry tomatoes in half?
Halving the tomatoes ensures the vinegar and spices penetrate every bite for maximum flavor infusion. The smaller surface area also helps maintain their vibrant green color during pickling. Plus, it creates a more uniform texture in each jar!
Can I use white vinegar instead of apple cider vinegar?
Yes, but expect a slightly sharper flavor profile. Apple cider vinegar adds subtle sweetness and complexity, while white vinegar delivers a cleaner, more acidic tang. For a compromise, use a 50/50 blend with rice vinegar. The pickling process will still work perfectly!
How do I know if my pickles are properly sealed?
After cooling for 12 hours, check the lid: if it's concave (pushed inward) and makes a "ping" sound when pressed, the seal is successful. If it pops up or stays loose, refrigerate immediately and use within 1 week. Proper sealing ensures 6 months of shelf life!
What can I do with extra brine?
Strain and reheat the leftover brine to use for 2-3 more batches of pickles! Store it in a clean jar in the fridge for up to 1 month. It's perfect for quick pickling cucumbers or radishes too. Just ensure everything stays fully submerged in the liquid.
Can I adjust the spice level for kids?
Simply omit the red chili flakes or reduce them to ¼ teaspoon. For extra mildness, strain out the mustard seeds before packing the jars. The dill and garlic will still provide great flavor without any heat.