Soups & Stews
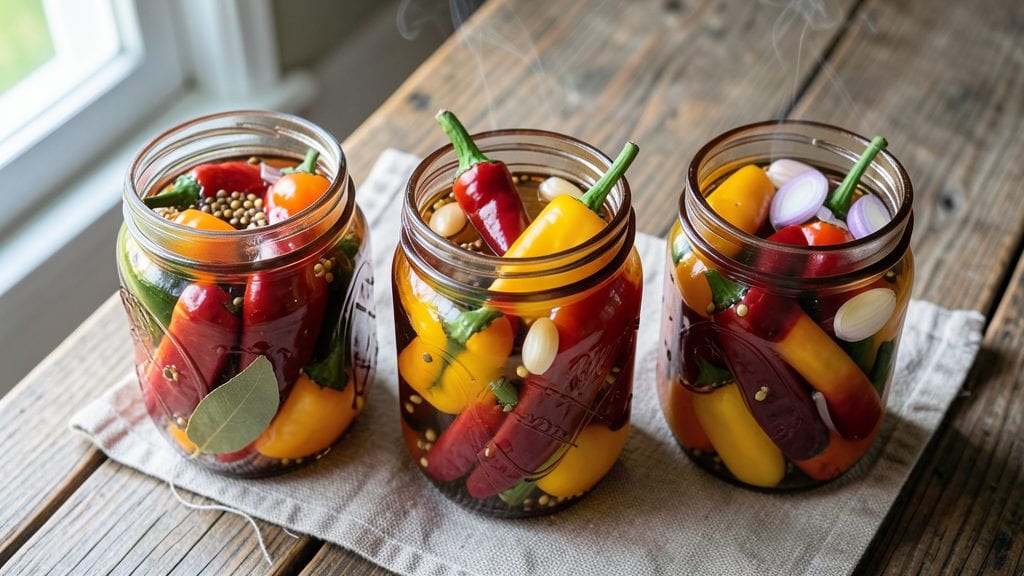
This pickled chili peppers recipe transforms fiery heat into a tangy, vinegar-bright condiment that elevates everything from tacos to cocktails. The secret lies in balancing sharp vinegar with precise spices—garlic, mustard seeds, and bay leaves—to create a flavor that lingers without overpowering.
I’ve perfected this method over years of testing, ensuring the peppers stay crisp and vibrant for months.
The process is simple but requires patience: peppers are packed in sterilized jars with a hot brine solution, then left to ferment for at least 2 weeks before reaching peak tanginess.
This slow method develops complex flavors while preserving the peppers’ signature crunch. The result? A condiment that’s bold enough to stand alone but versatile enough to enhance any dish.
Once ready, these pickled peppers add vinegar-bright heat to tacos, salads, or even Bloody Marys—think of them as edible garnishes that pack a punch.
Store them in the refrigerator for up to 6 months, and don’t hesitate to experiment with variations like adding citrus zest or a touch of sugar for balance. Every bite delivers a perfect mix of acidity, spice, and texture.
Whether you’re a home cook or a professional chef, this recipe is your go-to for restaurant-quality heat with minimal effort. The key is precision in the brine and proper fermentation—trust the process, and you’ll have a condiment that’s as reliable as it is delicious. Let’s get started!
Ingredients for pickled chili peppers
Pantry staples meet fiery freshness—just 10 ingredients for restaurant-quality pickled peppers.
| Ingredient | Amount | Notes |
|---|---|---|
| Fresh Chili Peppers 🌶️ | 1 ½ lb | Mixed types (jalapeño, serrano, or Thai), whole |
| White Vinegar 💧 | 2 cups | Distilled white vinegar preferred |
| Water 💧 | 2 cups | Filtered or bottled preferred |
| Salt 🧂 | 1 tbsp | Diamond Crystal kosher salt |
| Garlic Cloves 🧄 | 6 cloves | Unpeeled, lightly crushed |
| Mustard Seeds 🌾 | 1 tsp | Yellow or brown preferred |
| Bay Leaves 🌿 | 2 whole | Fresh or dried, high-quality |
| Black Peppercorns 🌶️ | 1 tsp | Freshly cracked preferred |
| Sugar 🍬 | 1 tbsp | White granulated sugar |
| Clean Pint Mason Jars 🍶 | 4 whole | With lids, sterilized |
The peppers are your canvas—mix jalapeños, serranos, or Thai chilis for complexity. Local farmers markets often have the freshest, but grocery store produce works too (just pick firm, unblemished pods). Garlic and bay leaves? Penzeys or bulk bins for the best quality—those dried leaves from the back of the spice aisle taste like cardboard. For vinegar, Heinz or Texas Pete are reliable, but any white vinegar in a dark glass bottle will do. Sugar balances the heat, but if you're using sweeter peppers like banana peppers, you can skip it entirely.
No mustard seeds? Ground mustard at half the amount works in a pinch (though texture suffers). Running low on bay leaves? Thyme or oregano at one-third the amount adds depth. For extra tang, swap half the water for apple cider vinegar—it adds subtle fruitiness. The sugar is optional but helps preserve color. If you're feeling adventurous, toss in a pinch of red pepper flakes for layered heat. And if you're pickling spicy Thai peppers, wear gloves—they pack serious heat!
Sterilize jars and lids by boiling for 10 minutes—no shortcuts here. Pack peppers tightly, then pour the hot brine (boiled water, vinegar, spices) to cover completely. Seal while warm and let cool to room temp before refrigerating. These keep for 6 months in the fridge, but the flavor peaks after 2-4 weeks. For gifting, use amber glass jars—they block light and preserve color longer. And trust me, you'll want to make extra—these disappear faster than you'd think!
Why You'll Love This Recipe
- Fridge Magic Ready: I swear by this—just slice the peppers, toss them in a jar with vinegar, salt, and smashed garlic, then let them sit. No babysitting, no fuss. By tomorrow, you’ve got tangy, crunchy peppers that taste like they’ve been curing for weeks.
- Garlic-Vinegar Punch: That first bite? The vinegar cuts through the peppers’ heat while the garlic softens into this sweet, funky depth. It’s the kind of flavor that makes you reach for seconds without even thinking—like a wake-up call for your taste buds.
- Pantry Superhero: Keep a jar in your fridge, and suddenly you’re the hero of tacos, sandwiches, or even scrambled eggs. I’ve used mine to spice up hummus, stir into dressings, or just snack straight from the jar. It’s the ultimate lazy-day flavor booster.
- Cheap & Lasts Forever: A few peppers and a bag of vinegar cost pennies, and one jar lasts me months. No sad, wilted leftovers here—just pickles that keep getting better with time. Honestly, it’s one of those recipes where the ingredients do all the work.
Step-by-step instructions for pickled chili peppers
Here's how to transform fresh peppers into bright, tangy pickles that'll elevate any dish.
Sterilize Jars and Prepare Peppers
Start by sterilizing the clean pint mason jars and lids. Place them in a large pot, cover with water, and bring to a boil for 10 minutes. This ensures your pickles stay fresh for months. While they sterilize, carefully wash the 1.5 pounds of fresh chili peppers—jalapeños, serranos, or Thai peppers all work beautifully. Remove stems but leave the peppers whole and uncut, as this preserves their shape and heat intensity.
Here's the thing—don't skip sterilizing. Even if the jars look clean, bacteria can lurk in microscopic crevices. Once sterilized, keep the jars hot until you're ready to fill them. This step is non-negotiable for safe, long-lasting pickles.
Create the Brine Mixture
In a large saucepan, combine the 2 cups of white vinegar, 2 cups of water, 1 tablespoon of salt, 1 tablespoon of sugar, 6 lightly crushed garlic cloves, 1 teaspoon of mustard seeds, 2 whole bay leaves, and 1 teaspoon of black peppercorns. Stir until the salt and sugar dissolve completely. The sugar balances the vinegar's sharpness, while the aromatic spices infuse the brine with depth.
Bring the mixture to a boil over medium-high heat, then reduce to a simmer for 5 minutes. This allows the flavors to meld and ensures the brine is hot when you add the peppers. The mustard seeds will pop slightly, adding a subtle crunch to the final product. Keep the heat at a gentle simmer—you don't want a rolling boil that could overcook the peppers.
Pack and Seal the Peppers
Using tongs, carefully place the sterilized peppers into each of the 4 pint mason jars, packing them snugly but not so tight they crack. Divide the peppers evenly so each jar has a similar number. Ladle the hot brine over the peppers, ensuring they're fully submerged. Leave about ½ inch of headspace at the top of each jar—this prevents the jars from sealing improperly.
Here's where precision matters: if peppers float, weigh them down with a small sterilized stone or a piece of parchment paper folded into a boat shape. The peppers need to stay submerged to pickle evenly. Tap the jars gently on the counter to remove any air bubbles trapped between the peppers.
Seal and Process the Jars
Once the jars are filled and the brine is hot, wipe the rims with a clean, damp cloth to remove any residue. Place the lids on the jars and screw on the bands until they're fingertip-tight—don't overtighten, or the jars won't seal properly. Transfer the jars to a pot or canner filled with about 2 inches of hot water. Bring to a boil and process for 10 minutes at a gentle rolling boil.
This boiling step drives out any remaining air and creates a vacuum seal as the jars cool. The peppers should be bright red or green, depending on their variety, with no signs of mold or discoloration after processing. If you hear a satisfying ping as the jars cool, that's your seal confirmation—it means they're properly preserved.
Cool, Store, and Enjoy
Remove the jars from the pot using tongs and let them cool on a towel-lined counter for 12 hours. This slow cooling allows the jars to seal completely. After cooling, check the seals by pressing down on the lids—they shouldn't pop up. If any jar doesn't seal, refrigerate it and use the peppers within a few weeks.
Store the sealed jars in a cool, dark place for up to 1 year. The peppers will develop deeper flavor over time, but they're ready to use as soon as they're cool. Slice them thin for tacos, chop them for salsas, or drop whole peppers into soups and stews. The tangy, vinegar-bright heat will transform any dish into something extraordinary.
Pro Tips For Making Pickled Chili Peppers
- STERILIZE JARS FIRST: I learned this the hard way—skipping sterilization leads to moldy peppers that ruin your whole batch. Boil jars and lids in simmering water for 10 minutes (even if you're reusing them), then keep them hot until filling. Cold jars = science experiment, not pickles.
- SLICE PEPPERS THINLY: Thick slices stay rubbery; thin ones pickle evenly. Aim for ⅛-inch slices—run your knife through the pepper at a slight angle for consistent thickness. (Yes, it takes a few extra swipes, but the texture makes a real difference.)
- USE HOT VINEGAR: Cold vinegar means cold pickles. Heat your vinegar-water mix to at least 180°F (just before boiling) to drive out air bubbles and ensure proper preservation. Pour it piping hot over the peppers—this also helps the garlic infuse faster.
- WEIGH DOWN PEPPERS: Peppers float, and floating peppers don’t pickle right. Tuck a small plate or cabbage leaf under the peppers to keep them submerged, then add a clean stone or weight. (I use a sterilized river rock—works every time.)
Regional styles of this pickled chili peppers
Mexican-Style Pickled Peppers
In Mexico, pickled chili peppers—called chiles escabeche—are a staple in street tacos and antojitos (snacks). I love using serrano or jalapeño peppers with a brining solution of white vinegar, garlic, and oregano instead of bay leaves. The secret?
Adding 1 tablespoon of apple cider vinegar to the brine for a fruity twist that pairs perfectly with queso fresco and corn tortillas. These peppers stay crisp and bright for up to 8 months when stored in the fridge. 🌶️
Thai-Inspired Sweet Chili Pickles
Thai cuisine transforms pickled peppers into a sweet-savory condiment by adding 1 tablespoon of palm sugar and 1 star anise pod to the brine. I use Thai bird’s eye chilis for maximum heat, then balance them with ½ cup coconut aminos instead of salt.
These pickles shine in Som Tum (green papaya salad) or as a garnish for grilled pork skewers. The sugar caramelizes slightly during storage, deepening the flavor over 3-4 weeks. ✨
Southern U.S. Hot Pepper Relish
The American South takes pickled peppers to another level by blending them into a chunky relish with onions, celery, and a splash of apple cider vinegar. I like using Cayenne or habanero peppers for heat, then adding 1 teaspoon of smoked paprika to the brine for a smoky depth.
This relish is perfect for sandwiches, deviled eggs, or fried chicken. The peppers stay vibrant for 6 months when canned properly. 🔥
Moroccan Preserved Chili Peppers
Moroccan cuisine preserves chili peppers with coriander seeds, cumin, and a touch of cinnamon in the brine. I use harissa peppers (or a mix of jalapeños and serranos) and add 1 teaspoon of ground coriander and ½ teaspoon of cumin to the brine.
These peppers are a must for tagines, couscous, or spiced lamb dishes. The spices infuse beautifully over 2-3 weeks, creating a fragrant, aromatic condiment. 🌿
Korean Gochujang-Inspired Pickles
For a Korean-inspired twist, I blend gochujang (Korean chili paste) into the brine—about 1 tablespoon per jar—along with 1 tablespoon of honey and 1 teaspoon of sesame seeds. These pickles are perfect for bibimbap, Korean fried chicken, or even as a topping for ramen.
The gochujang adds a fermented depth that develops over 4-6 weeks, making them richer than traditional vinegar pickles. 💛
Nutrition facts
Frequently asked questions
Can I use dried chili peppers instead of fresh?
Fresh peppers work best for crisp texture, but you can adapt this recipe for dried peppers. Soak ½ cup dried chilis in warm water for 30 minutes to rehydrate, then pack them into jars with the same brine ratio. Reduce fermentation time to 1 week since dried peppers pickle faster. The heat will be more concentrated, so adjust to taste.
Why do my pickled peppers turn mushy?
Mushy peppers usually mean overcooking during the boiling process or improper storage. Always pack peppers into jars after the brine boils, and never let them sit in boiling water longer than 5 minutes. Store sealed jars in a cool, dark place—they’ll stay crisp for 6+ months. If using unsealed jars, refrigerate and consume within 2 weeks.
How spicy will these pickled peppers be?
The heat depends on the peppers you choose: jalapeños are mild, serranos are medium, and Thai bird’s eye chilis are fiery. For milder pickles, remove seeds and membranes before packing. For extra heat, leave seeds intact or add a pinch of red pepper flakes to the brine. Always taste-test before using in dishes!
Can I make this recipe without vinegar?
Vinegar is essential for preservation and tangy flavor, but you can experiment with lemon juice or apple cider vinegar> for a milder taste. Replace the 2 cups of white vinegar with 2.5 cups of lemon juice> (plus 1 extra tablespoon of salt) to mimic acidity. However, vinegar pickles last 6+ months, while citrus versions keep only 2-3 weeks refrigerated.
What are the best ways to use these pickled peppers?
Slice thin for tacos, chop for salsas, or drop whole into soups—these pickles add vinegar-bright heat to everything! Try them on grilled cheese sandwiches, as a garnish for ramen or Bloody Marys, or mixed into mayonnaise**> for spicy deviled eggs. The possibilities are endless—just balance their acidity with rich, creamy, or fatty dishes.