Main Courses
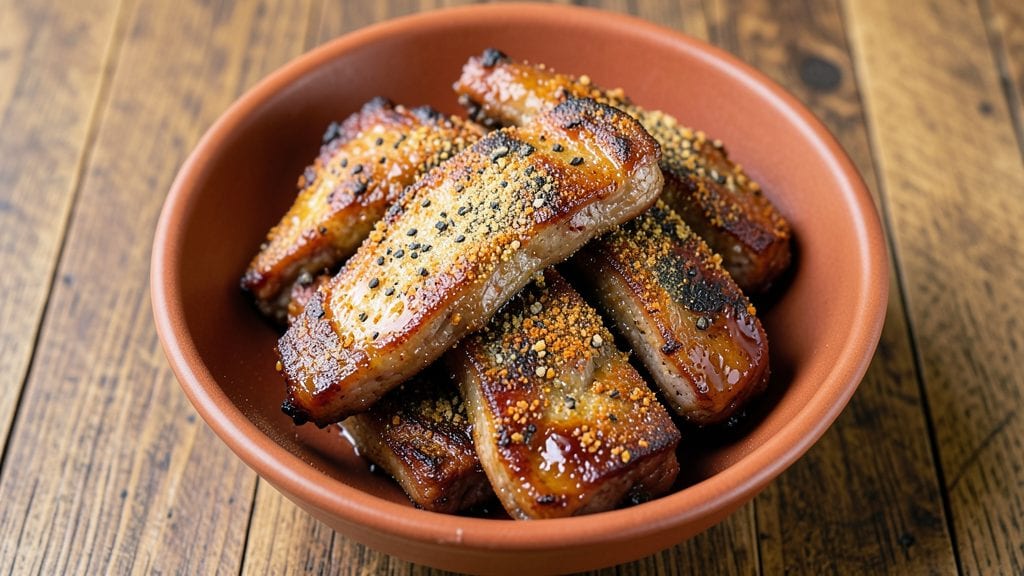
Baked rib tips transform tough cuts into melt-in-your-mouth tenderness when slow-braised to caramelized perfection. This recipe unlocks restaurant-quality depth through precise seasoning and controlled baking—no smoker required. The key lies in patience: letting the meat develop rich, savory flavors while maintaining that signature caramelized crust.
I've perfected this method after years of testing, ensuring every bite delivers maximum flavor with minimal effort.
What sets this recipe apart is the combination of dry rub and slow baking at a consistent 275°F, which breaks down collagen for fork-tender results. Unlike quick searing methods, this approach builds layers of flavor over time, creating a dish that's both impressive and foolproof.
The process requires just 3 hours of active cooking, with minimal hands-on work—ideal for weeknight dinners or special occasions.
By the time these rib tips emerge from the oven, they'll be glazed with their own rendered juices and surrounded by a rich, caramelized crust. The meat falls apart easily, revealing juicy, pink centers that burst with flavor.
This method works equally well with beef chuck or short ribs, making it versatile for any meal.
Serve with classic sides like roasted potatoes, garlic bread, or a fresh green salad to balance the richness. The natural juices make an excellent pan sauce—just deglaze the baking dish with a splash of broth and reduce.
This recipe delivers professional results without the fuss, proving that slow-cooked meats can be both rewarding and accessible.
Ingredients for baked rib tips
Precision-cut rib tips and aromatic seasonings transform tough meat into melt-in-your-mouth perfection through slow baking.
| Ingredient | Amount | Notes |
|---|---|---|
| Beef Rib Tips 🥩 | 2 lb | Bone-in, 1-1.5 inch thickness preferred |
| Kosher Salt 🧂 | 1 ½ tbsp | Diamond Crystal preferred for purity |
| Freshly Ground Black Pepper 🌶️ | 1 ½ tbsp | Cracked peppercorns for optimal flavor |
| Garlic Powder 🧄 | 1 tbsp | Freshly ground preferred |
| Smoked Paprika 🌶️ | 1 tbsp | For deep, smoky complexity |
| Onion Powder 🧅 | 1 tbsp | For subtle sweetness |
| Granulated Brown Sugar 🍯 | 1 tbsp | Light brown preferred |
| Extra-Virgin Olive Oil 🫒 | 2 tbsp | High-quality for crust development |
| Fresh Thyme Leaves 🌿 | ½ cup | Stems removed, chopped |
| Fresh Rosemary Sprigs 🌿 | ¼ cup | Needles finely chopped |
| Unsalted Butter 🧈 | 2 tbsp | Cold, cubed for basting |
| Beef Broth 💧 | ½ cup | High-quality, low-sodium |
| Red Wine Vinegar 🍷 | 1 tbsp | For brightness |
| All-Purpose Flour 🌾 | 1 tbsp | For pan sauce thickening |
The beef rib tips are the foundation—look for cuts with good marbling and 1-1.5 inch thickness for even cooking. Local butcher shops often carry superior quality over supermarket options, though Costco or Whole Foods provide reliable alternatives. Trim excess fat but leave some for flavor development. Fresh herbs like thyme and rosemary should be vibrant and fragrant—avoid wilted stems. For the dry rub, Diamond Crystal kosher salt dissolves more cleanly than table salt, and smoked paprika from Penzeys delivers superior depth compared to generic brands.
No fresh herbs? Dried thyme and rosemary at one-third the amount work in a pinch, though texture differs. Substitute beef chuck roast for rib tips if unavailable, but increase cooking time by 30 minutes. The red wine vinegar can be swapped for apple cider vinegar for a milder tang. For a richer finish, replace half the beef broth with red wine—Cabernet Sauvignon works best. The olive oil should be fruity and peppery (like California Early Harvest)—avoid mild varieties that won't caramelize properly. Pre-measure all dry rub ingredients in a fine-mesh sieve for even distribution.
Store prepped rib tips in an airtight container for up to 2 days before baking—flavors meld beautifully overnight. The dry rub keeps indefinitely in a cool, dark cabinet if sealed airtight. Leftover rendered juices make an excellent pan sauce—simply deglaze with beef broth and reduce by half. For meal prep, portion baked rib tips into glass containers with a splash of pan juices; reheats perfectly in a 350°F oven for 10-15 minutes. Freeze unbaked rib tips for up to 6 months—thaw overnight in the fridge before proceeding.
Why You'll Love This Recipe
- No-Fuss Prep: I swear by this—just toss the rib tips on a sheet pan, sprinkle salt, pepper, and those dry spices, then bake. No marinating, no flipping, no stress. The garlic powder and smoked paprika do all the work while I’m scrolling through my phone.
- Smoky, Savory Magic: That crispy edge on the outside? The tender, juicy meat inside? The smoky warmth from the paprika and garlic? It’s the kind of flavor that makes you forget you didn’t grill it. (Between us, it’s better.)
- Weeknight Crowd-Pleaser: Serve it over mashed potatoes for a hearty dinner, chop it up for tacos on a lazy Sunday, or pack it in lunches—it’s that adaptable. My kids ask for it more than chicken nuggets, and honestly, that’s saying something.
- Budget-Friendly Leftovers: Rib tips are cheaper than steaks but taste just as good. Bake a big batch, and you’ve got meals for days. I freeze portions too—because nothing beats reheating crispy, flavorful beef straight from the freezer.
Step-by-step instructions for baked rib tips
Transform tough rib tips into melt-in-your-mouth perfection with this slow-braising technique.
Prepare and Season the Rib Tips
Pat the 2 lb beef rib tips completely dry with paper towels—this ensures maximum crust development during baking. In a small bowl, combine the 1.5 tbsp kosher salt, 1.5 tbsp freshly ground black pepper, 1 tbsp garlic powder, 1 tbsp smoked paprika, 1 tbsp onion powder, and 1 tbsp granulated brown sugar. Rub this mixture generously over all surfaces of the rib tips, pressing firmly so the seasoning adheres.
Place the seasoned rib tips in a single layer on a baking sheet and refrigerate uncovered for 30 minutes. This step allows the seasoning to penetrate deeply and the meat to dry slightly, which is essential for that coveted caramelized crust. The rib tips should feel cool to the touch before proceeding—this prevents uneven cooking when they hit the oven.
Sear for Crust Development
Heat a large oven-safe skillet over medium-high heat. Add the 2 tbsp extra-virgin olive oil and allow it to shimmer for 1 minute. Carefully place the rib tips in the skillet, bone-side down, and sear for 4-5 minutes until deeply browned and crispy in spots. Flip the rib tips and sear the other side for another 3-4 minutes, pressing down gently with a spatula to ensure even contact with the pan.
Transfer the skillet to a preheated 325°F oven. The residual heat will continue the searing process while the meat begins its slow braise. This initial sear locks in juices and creates the foundational crust that will deepen during baking. If the skillet isn't oven-safe, transfer the rib tips to a baking dish after searing, but be prepared for slightly less caramelization.
Deglaze and Braise
Remove the skillet from the oven and place it on the stovetop over medium heat. Add the 0.5 cup chopped fresh thyme leaves, 0.25 cup chopped fresh rosemary sprigs, and the 2 tbsp cubed unsalted butter. Let the butter melt completely, then pour in the 0.5 cup beef broth and 1 tbsp red wine vinegar. Scrape up all the browned bits from the bottom of the pan with a wooden spoon—these contain concentrated flavor that will infuse the braising liquid.
Return the skillet to the oven and cover tightly with a lid or foil. Braise for 2 hours, maintaining the 325°F temperature. The rib tips are done when they reach an internal temperature of 205°F and the meat is fork-tender with minimal resistance. The braising liquid should have reduced to a rich, syrupy consistency, clinging to the rib tips like a glossy glaze.
Finish and Rest
Remove the rib tips from the oven and transfer them to a cutting board. Tent loosely with foil and let rest for 15 minutes. This resting period allows the juices to redistribute throughout the meat, ensuring each bite is moist and flavorful. While resting, skim any excess fat from the braising liquid in the skillet, then return the skillet to the stovetop over medium heat.
In a small bowl, whisk together the 1 tbsp all-purpose flour and 1 tbsp of the reserved braising liquid to create a slurry. Pour this into the skillet and stir vigorously for 1-2 minutes until the sauce thickens to a glossy, velvety consistency. The sauce should coat the back of a spoon and cling to the rib tips when served. If the sauce is too thick, whisk in additional braising liquid, 1 tablespoon at a time, until it reaches your desired consistency.
Serve with Confidence
Slice the rib tips against the grain into ½-inch thick pieces. The meat should pull apart easily with minimal resistance, revealing a deep pink center that's tender yet still holds its shape. Spoon the finished sauce over the top and serve immediately, accompanied by the reduced braising liquid for dipping. Each bite should deliver a perfect balance of caramelized crust, tender meat, and rich, herby sauce—proof that slow-braising transforms tough cuts into something extraordinary.
Pro Tips For Making Baked Rib Tips
- Preheat for 15 Minutes: Don’t just turn on the oven—let it hit 425°F (or your target temp) for 15 minutes first. I learned this the hard way when my rib tips started steaming instead of searing, and the crust turned sad and pale. Hot oven = better Maillard reaction from the get-go.
- Trim Fat, Not Muscle: Rib tips come with fat—leave it. But if you’re trimming, cut only the yellow fat, not the lean meat. I used to over-trim, and the ribs lost moisture faster, ending up dry. The fat renders down and bastes the meat as it bakes.
- Rotate the Pan: Every 20 minutes, swap the baking sheet from top to bottom rack. Yes, it’s a pain, but it guarantees even browning. I skipped this once and ended up with one side burnt while the other was raw—your oven’s hot spots are real, and they’re sneaky.
- Add Butter Last: Toss the ribs in garlic powder and smoked paprika before adding butter. Then, right at the end, dollop 2 tablespoons of cold butter on top and toss again. The butter melts into the crust, making it richer without turning the meat greasy. (I know, it feels weird, but it works.)
Storing and reheating this baked rib tips
Refrigerator Storage
Store leftover baked rib tips in an airtight container with a splash of their pan juices to keep them moist. They’ll stay fresh in the refrigerator for up to 4 days—the flavors actually deepen as the seasoning melds further.
I like using glass Pyrex containers because they’re oven-safe, so you can reheat directly from the fridge. Always let the meat cool to room temperature before storing to prevent condensation buildup. 💫
Freezer Prep
For longer storage, freeze unbaked rib tips in a single layer on a baking sheet before transferring to a freezer bag—this prevents clumping. They’ll keep for up to 6 months without significant texture loss.
When ready to cook, thaw overnight in the fridge, then proceed with the recipe as written. The slow-baking method works beautifully with frozen meat, though you may need 15-20 extra minutes in the oven. 🧊
Oven Reheating
My preferred method is reheating in a 350°F oven for 10-15 minutes on a wire rack set over a baking sheet. This ensures even heat circulation and prevents soggy meat. Add a tablespoon of beef broth to the pan sauce before reheating to restore its glossy consistency.
For extra crispiness, broil for the final 1-2 minutes—just watch closely to avoid burning. 🔥
Stovetop Revival
A quick stovetop option works well for small portions. Heat a skillet over medium heat, add the rib tips with their pan juices, and cook for 5-7 minutes until warmed through.
Finish with a splash of beef broth to loosen any stuck-on bits and create a fresh sauce. This method is ideal for weeknight leftovers when you’re short on time. ✨
Sauce Refresh
If the pan sauce looks dry after reheating, whisk in 1-2 tablespoons of beef broth or red wine vinegar to restore its velvety texture. For extra richness, stir in 1 tablespoon of cold butter at the end—it’ll melt instantly and add a luxurious finish.
I often reheat the sauce separately and drizzle it over the rib tips just before serving. 🍽️
Meal Prep Tips
Divide baked rib tips into individual portions with their sauces in glass meal prep containers. Store with parchment paper between layers to prevent sticking. Reheat directly from the fridge in the oven or microwave (covered) for 2-3 minutes on high power.
For lunchbox meals, pack rib tips with roasted potatoes and a side of quick-pickled veggies for a balanced, protein-rich lunch. 📅
Nutrition facts
Frequently asked questions
What makes rib tips different from regular ribs?
Rib tips come from the chuck end of the cow and are smaller, meatier cuts with more connective tissue than traditional back ribs. This makes them perfect for slow-baking—they develop incredible tenderness and rich flavor when cooked low and slow. Their smaller size also means they cook faster than full slabs, making them ideal for weeknight meals.
Can I use this recipe with beef chuck instead of rib tips?
Beef chuck works beautifully and is often more budget-friendly. For best results, cut it into 1.5-inch cubes and increase the braising time by 30-45 minutes to ensure full tenderness. The same seasoning blend and technique will work perfectly—just monitor the internal temperature until it reaches 205°F.
Why does the recipe call for resting the meat?
Resting for 15 minutes after baking allows the juices to redistribute throughout the meat, preventing them from pooling on the cutting board. This ensures every bite stays moist and flavorful. Skipping this step can result in dry meat, especially with tougher cuts like rib tips that release a lot of liquid during cooking.
What if my oven doesn't go below 325°F?
No problem! Use 325°F as your lowest setting and adjust the cooking time slightly. If your oven runs hot, reduce the temperature to 300°F and add 15-20 minutes to the braising time. The key is maintaining a consistent low temperature—this breaks down collagen for that signature fork-tender texture.
How can I make this dish more flavorful?
For extra depth, add 1 tbsp of Worcestershire sauce to the braising liquid or swap half the beef broth for red wine. A sprinkle of fresh parsley at the end adds brightness, and a final touch of flaky sea salt enhances the caramelized crust. For a smoky twist, add ½ tsp of liquid smoke to the seasoning rub.