Soups & Stews
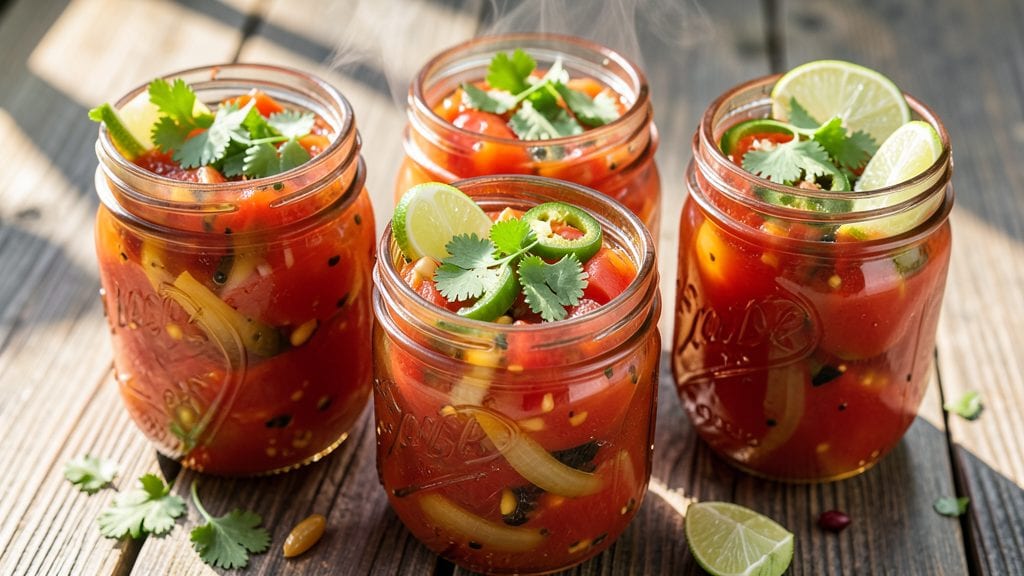
This garden tomato salsa canning recipe captures the sun-kissed taste of summer in every jar, making it one of the most rewarding canning projects you can tackle. The key lies in balancing fresh ingredients with precise acidification to ensure both safety and flavor—no bland, watery results here.
I’ve perfected this method over years of summer harvests, and the results stay fresh-tasting for months.
This recipe transforms ripe tomatoes, crisp onions, and fresh peppers into a bold, chunky salsa with just the right tang. The process involves sterilizing jars, processing them in a boiling water bath, and sealing them properly—no shortcuts, just reliable techniques.
Every step is designed to lock in that sun-ripened flavor while maintaining texture and safety.
By the time you’re done, you’ll have jars of vibrant, restaurant-quality salsa that’s perfect for dipping, topping, or gifting. The acidification from lime juice and vinegar ensures long shelf life while keeping the flavors bright.
Whether you’re a beginner or a seasoned canner, this method delivers consistent, professional results every time.
Use this salsa on tacos, nachos, or as a condiment—its versatility makes it a pantry staple. The beauty of canning lies in transforming summer’s bounty into year-round enjoyment. Let’s preserve that garden goodness for months to come.
Ingredients for garden tomato salsa canning
Sun-ripened tomatoes, precise acidification, and professional canning techniques transform summer's bounty into vibrant, restaurant-quality salsa.
| Ingredient | Amount | Notes |
|---|---|---|
| Ripe Garden Tomatoes 🍅 | 6 lb | Vine-ripened, cored and chopped |
| Yellow Onions 🧅 | 2 whole | Medium size, diced finely |
| Jalapeño Peppers 🌶️ | 4 whole | Seeds removed for mild heat |
| Fresh Cilantro 🌿 | ½ cup | Stems removed, chopped fine |
| Fresh Lime Juice 🍋 | ½ cup | Freshly squeezed, no pulp |
| White Vinegar 💧 | ¼ cup | Distilled, 5% acidity |
| Granulated Sugar 🍚 | ½ cup | White, for acid balance |
| Salt 🧂 | 1 ½ tsp | Diamond Crystal kosher |
| Garlic Cloves 🧄 | 6 cloves | Peeled, minced fine |
| Pint-Sized Mason Jars 🥫 | 6 jars | With lids and bands |
The tomatoes are the heart of this recipe—vine-ripened garden varieties deliver the most complex flavor. Look for heirloom or beefsteak types at farmers markets or well-stocked grocery stores like Whole Foods or Trader Joe's. The onions should be firm and crisp, not wilted. For jalapeños, fresh is non-negotiable—dried peppers lack the bright acidity needed for proper acidification. Store all fresh ingredients in the refrigerator until ready to use, ideally within 2-3 days of purchase for peak flavor. The Mason jars should be new or previously sterilized—never reuse jars without proper cleaning and boiling.
No fresh cilantro? Dried cilantro or oregano at half the amount works in a pinch, though the flavor will be different. Substitute lemon juice for lime if needed, but maintain the same acidity level. For those avoiding sugar, reduce vinegar by 1 tbsp and add an extra pinch of salt to balance. The garlic can be roasted for sweeter flavor—wrap whole cloves in foil and bake at 400°F for 15 minutes before mincing. For canning safety, never substitute vinegar with lemon juice alone—the acidity levels must meet USDA guidelines for home canning.
This salsa maintains peak quality for 12-18 months when stored in a cool, dark place. Once opened, refrigerate and consume within 1 week. For best results, store unopened jars upright to prevent lid corrosion. The flavor actually improves after 2-3 months of storage as the ingredients meld. When ready to use, simply open and serve—no reheating required. The acidified salsa is safe for up to 1 year when processed correctly, making it an excellent pantry staple for year-round enjoyment of summer's harvest.
Why You'll Love This Recipe
- No-Fuss Canning: I swear by this recipe because it turns my garden’s tomato glut into jars of summer in under an hour—no fancy equipment, just a big pot and my trusty canning jars. The onions caramelize just enough to add depth without overpowering, and the jalapeños give that perfect little kick that makes it feel special.
- Sunshine in a Jar: That bright, tangy burst from the lime juice and fresh cilantro? It’s like summer vacation in every bite. The garden tomatoes—sweet, juicy, and bursting with flavor—make this taste like you spent all day picking them yourself, even if you just grabbed them from the store.
- Party-Ready Pantry Staple: Between us, this salsa is my secret weapon for game days, potlucks, or when I forget to buy chips. It’s the one thing I always have on hand, and it works just as well with tortilla chips as it does spooned over grilled fish or scrambled eggs. (Yes, even on a Tuesday night.)
- Zero-Waste Victory: Honestly, this recipe saved me last summer when my tomato plants went wild. I turned pounds of ripe (read: about-to-spoil) tomatoes into jars that lasted all winter, and the onions and peppers stretched my grocery budget. Plus, the leftovers? They’re so good I forget I’m eating something I made months ago.
Step-by-step instructions for preserving summer's flavor in glass
Follow this precise method to transform your garden harvest into vibrant, shelf-stable salsa with perfect acidity balance.
Prepare and Sterilize Your Mason Jars and Equipment
Begin by washing the 6 jars pint-sized mason jars with hot, soapy water, then rinse thoroughly. Place them upside down on a baking sheet and heat in a 250°F oven for 10 minutes to sterilize. While they warm, prepare your canning equipment by sanitizing lids and bands in simmering water—this prevents contamination and ensures a proper seal.
I always use a dedicated canning pot for this process to maintain consistent temperatures. Keep jars hot until you're ready to fill them. The goal is to create an airtight environment that preserves both color and flavor while preventing spoilage. Don't skip this sterilization step—it's the foundation of safe home canning.
Process the Tomatoes and Build the Salsa Base
In a large stockpot, combine the 6 lb ripe garden tomatoes (cored and chopped), 2 whole yellow onions (finely diced), 4 whole jalapeño peppers (seeds removed and chopped), and 6 cloves garlic (minced fine). Bring to a boil over medium-high heat, then reduce to a simmer for 15 minutes until the mixture softens and the onions become translucent.
While processing, I like to taste the mixture occasionally—you want the tomatoes to break down just enough to release their juices while maintaining some texture. The onions should be completely tender but not mushy. This step develops the foundational flavors that will carry through your preserved salsa.
Incorporate Acidifying and Sweetening Agents
Remove the pot from heat and stir in the 0.5 cup fresh lime juice, 0.25 cup white vinegar, 0.5 cup granulated sugar, and 1.5 tsp salt. The lime juice and vinegar work together to create the proper acidity level for safe canning while balancing the natural sweetness of the tomatoes. Mix thoroughly until all ingredients are evenly distributed.
Let the mixture cool slightly for 5 minutes—this prevents steam from building up when you add the hot liquid to the jars. The sugar helps balance the acidity while enhancing the natural sweetness of the tomatoes. Taste the mixture again at this stage to ensure the acidity is sufficient (it should have a noticeable tang).
Fill Jars and Process for Shelf Stability
Using a ladle or funnel, carefully fill each of the 6 jars pint-sized mason jars with the hot salsa mixture, leaving ½-inch headspace at the top. Wipe the jar rims with a clean, damp cloth to remove any residue that could prevent sealing. Place lids on the jars and screw on bands until fingertip-tight.
Process the filled jars in a boiling water bath for 35 minutes—this is critical for destroying any potential pathogens while maintaining the vibrant color and fresh flavor. I use a canning rack in my stockpot to ensure even heat distribution. The jars should be completely submerged with at least 1 inch of water covering the tops.
Cool, Check Seals, and Store Properly
After processing, remove the jars and let them cool on a towel-lined counter for 12 hours. You'll hear the satisfying "ping" as the lids seal. Check each lid by pressing in the center—if it doesn't pop back up, the seal is successful. Any jars that don't seal should be refrigerated and used within 1 week.
Store properly sealed jars in a cool, dark place for up to 1 year. The salsa will maintain its vibrant color and bright flavors, perfect for year-round enjoyment. The acidity from the lime juice and vinegar combination ensures both safety and preservation while the sugar maintains the natural sweetness of your garden tomatoes.
Pro Tips For Making Garden Tomato Salsa Canning
- Blister Peppers First: DESCRIPTION: Toss whole jalapeños in a dry skillet over medium-high heat for 30 seconds per side until skin blackens slightly. This softens them and mellows the heat—no need to peel if you skip this step, but your salsa will taste deeper when you do. (I used to skip it and wondered why my salsa always had a sharp edge.)
- Core Those Tomatoes: DESCRIPTION: Cut out the stem scars and any bruised spots before chopping—those are where bacteria hide. A paring knife works faster than a serrated one for this, and it keeps your salsa cleaner during the canning process. (Trust me, you’ll notice the difference after the first jar.)
- Sweat Onions Low: DESCRIPTION: Cook yellow onions in batches over low heat until translucent but not brown—just enough to soften them without caramelizing. Overcooking turns them bitter, and your salsa will taste flat. A splash of water or broth helps if they stick, but scrape the pan often.
- Acidify Before Canning: DESCRIPTION: Mix lime juice into the salsa after processing, but add bottled lemon juice (1 tablespoon per pint) before sealing—it’s the non-negotiable safety step. Fresh lime won’t cut it for shelf stability, and skipping this is how you end up with a science experiment instead of salsa. (I learned this after a very sad batch.)
Serving suggestions for this garden tomato salsa canning
Taco Night Essentials
This vibrant salsa transforms any taco night into a fiesta. Serve it warm with corn tortillas and your favorite fillings like shredded chicken or seasoned ground beef. I love adding crumbled queso fresco on top for a creamy contrast.
For extra flair, sprinkle with freshly chopped cilantro and a pinch of smoked paprika right before serving. 🌮
Nacho Bar Spread
Create a nacho bar by layering baked tortilla chips with this salsa, then add toppings like black beans, shredded cheese, diced avocado, and sour cream. The acidity in the salsa cuts through the richness of the cheese beautifully.
I recommend using stone-ground tortilla chips for that authentic crunch. Serve with lime wedges for guests to squeeze over their plates.
Breakfast Pairings
Don't limit this salsa to dinner! Use it as a breakfast condiment with scrambled eggs and crispy bacon. The bright flavors wake up your palate perfectly. I also love it on breakfast burritos with sautéed potatoes and cheddar cheese.
For a vegetarian option, spread it on toasted bagels with cream cheese and smoked salmon for a brunch twist.
Garnishing & Presentation
For restaurant-quality presentation, garnish with cilantro sprigs and a drizzle of olive oil before serving. The vibrant green color makes any dish look more appetizing. I also like adding toasted pumpkin seeds for extra crunch.
For a smoky touch, sprinkle with chipotle powder or crumbled chorizo on top. These finishing touches elevate your salsa from homemade to gourmet. ✨
Gifting & Hosting
This salsa makes an excellent homemade gift. Tie a burlap ribbon around the jar and attach a handwritten note about the harvest year. I always include a recipe card with serving suggestions for my friends.
At gatherings, set out small bowls of salsa with chips and dippers for easy snacking. The combination of bright flavors and beautiful presentation makes it a crowd-pleaser at any party.
Leftovers Reinvented
Use any remaining salsa to create salsa verde by blending with tomatillos and serrano peppers. Or mix it into pasta sauce for a quick weeknight dinner. I also love spreading it on grilled sandwiches with avocado and sprouts.
The versatility of this preserved salsa means you'll never run out of ways to enjoy it. 💡
Nutrition facts
Frequently asked questions
Why is acidification so important in this tomato salsa recipe?
Acidification (from lime juice and vinegar) is critical for safe canning. Tomatoes are low-acid fruits, making them prone to botulism if not properly acidified. The USDA recommends a pH of 4.6 or lower for shelf-stable salsa. This combination creates the perfect balance of tang and safety while preserving vibrant flavors.
Can I use store-bought tomatoes instead of fresh garden tomatoes?
While you can substitute store-bought tomatoes, fresh garden tomatoes yield superior flavor. Vine-ripened varieties have more complex sugars and acids. If using store-bought, select heirloom or Roma tomatoes (highest acidity) and add an extra 1 tbsp of vinegar per pint jar to ensure proper acidification.
How do I know if my sealed jars are properly preserved?
After cooling 12-24 hours, press the center of each lid. If it doesn't pop back up, the seal is successful. Also check for liquid under the lid (should be concave) and no mold or foul odors. Any jars that fail should be refrigerated and used within 1 week. Properly sealed jars will last 12-18 months in a cool, dark place.
Can I adjust the spice level in this salsa?
Remove all seeds and membranes from jalapeños for mild heat, or keep them for medium spice. For extra heat, add 1-2 serrano peppers (seeds in) per batch. For smoky flavor, add ½ tsp smoked paprika when mixing the acidifying agents. Always taste before canning to ensure proper balance.
What should I do if my salsa turns cloudy or separates after opening?
This is normal if you didn't heat the salsa before serving. Simply reheat in a saucepan over medium heat for 5-10 minutes, stirring occasionally, until it reaches 160°F. The texture and color will return to normal. If the cloudiness persists, it may indicate improper sealing during canning—discard if there's any off odor or mold.